If you are looking to learn about the Concept 2 Bike (called the BikeErg), you’ve come to the right place.
The BikeErg is a fantastic training tool to improve your conditioning for many sports including CrossFit, MMA cycling, and even running. I’ve had great success using it with many clients and athletes over the years.
But information about this exercise bike isn’t always readily available for those who want to take full advantage of it. The BikeErg packs so many great features that everyone should know about it and how exactly it can benefit their health and their training.
That’s why I created this guide. Whether you’re looking to purchase a Concept 2 bike or you just want to get the most out of the BikeErg in your gym, this guide is your gateway to knowing everything you need to know about the BikeErg.
1) Introducing the Concept 2 Bike Erg
The BikeErg was launched in 2017 by Concept 2 to complete their “family of sport-based ergometers.” After the success of the Rower and the SkiErg, the BikeErg completes the trio of ergometers from Concept 2.
This high-quality exercise bike reminds us of the Concept2 predecessors with its slick colours, flywheel, and powerful PM5 (Performance Monitor). The flywheel provides a smooth, air-based resistance to the ride while the damper serves as the gears. Concept 2 poured their 45+ years of experience into this project in order to build the best bike possible. And boy did they succeed!
The BikeErg is a highly versatile training tool: it allows you to perform everything from long efforts (like Zone 2 training) all the way to short, sprint interval-based workouts lasting just a few seconds.
Plus this bike is built to last. Its aluminum frame makes it both lightweight and durable. At just under 32kg, it is lighter than most stationary bikes. These features make it a preferred piece of equipment for CrossFit gyms around the world.
After this brief overview, let’s now look at the bike’s technical specifications in more detail.
2) Technical Specifications
The Concept 2 bike comes with a 122 cm x 61 cm (48 in x 24 in) footprint when fully assembled. The brand recommends a 152 cm x 122 cm (60 in x 48 in) clearance when for optimal use.
The bike itself weights 31kg (68 lbs) and has a maximum user weight of 136kg (300 lbs). Its frame is made of welded aluminium topped with a black powder coating.
The seat to pedal distance ranges from approximately 79 cm to 103 cm (31 to 40.5 in). The handlebars are easily adjustable to fit either a comfortable ride or a more involved racing position if you feel so inclined. You can find details about exact sizing in this Concept 2 BikeErg Sizing Document.
To share my personal experience with it, I really enjoy how easy it is to adjust. I use the bike very frequently and so does my wife. She’s much quite a bit shorter than me but doesn’t have any issues with the seat height at all. It adjusts perfectly.
This chainless bike uses “polygroove belts with [a] self-tensioning system” as the drive. This ensures a quiet ride and reduces maintenance needs. The crank length comes in at a standard 170 mm.
Although the bike’s drive is smooth and quiet, the flywheel does make some noise. Check out this short video on BikeErg noise for more info:
One big advantage of the BikeErg is that you can customize it using most standard bike parts. You can change the saddle, handlebars, and even the pedals if you prefer to ride with your usual cycling clips and shoes on.
For more information, you can find the complete list of specifications for the BikeErg here.
2.1) BikeErg: Cost and Where to Buy
The Concept 2 bike currently retails for $1100 US on the official Concept 2 shop.
Shipping details for the USA can be found here.
If you wish to buy a BikeErg outside of the USA, the full list of international resellers can be found on the Concept 2 website.
Having owned Concept 2 equipment for many years now, I can only recommend it. Not only is it reasonably priced, these machines will last forever. It is an investment worth making!
Now that we’ve gone over the bike’s main features, let’s dive into how to use its full potential.
3) How to use the Concept 2 Bike
In this chapter, you’ll learn everything you need to know about the BikeErg and how to use it.
First, we will start by talking about the setup so you can find the ride that fits you best. Then, once the bike is properly set up, we will dive into the PM5 (Concept 2’s powerful Performance Monitor) with an in-depth video guide. Finally, I’ll show you how to use the free Concept 2 app (called ErgData) to record all your training sessions and keep track of your progress right from your smartphone.
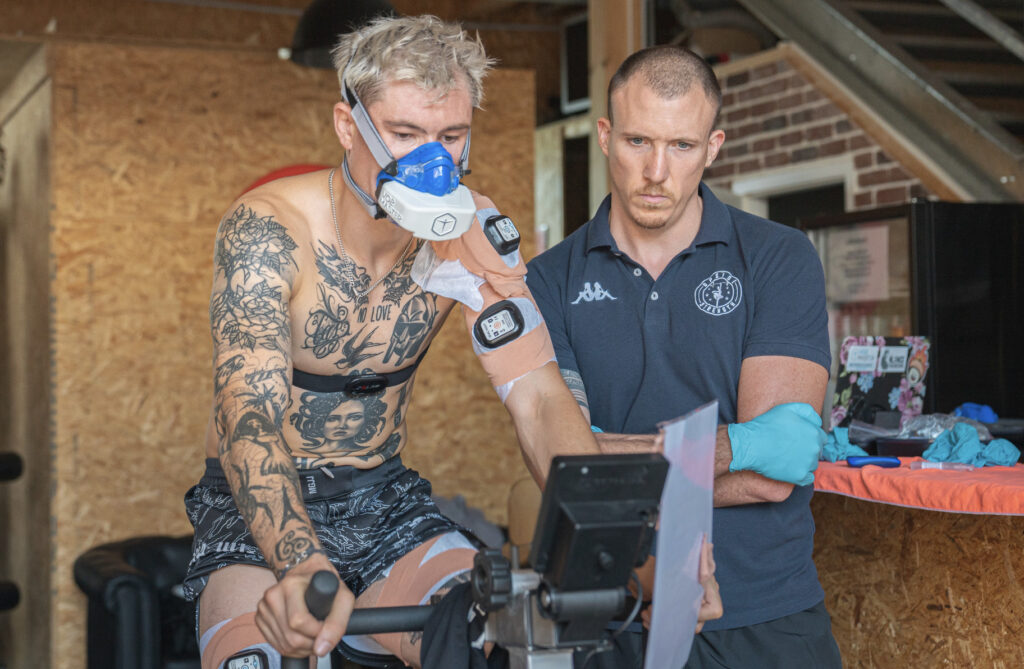
Before we dive in, let me share my personal experience with it. It’s truly a bike that is adapted to all people and all levels. I’ve used it with my 65yo+ personal training clients as well as with CrossFit competitors during my physiological testing sessions. I’ve even tested experienced cyclists on this bike and they were always pleasantly surprised by the BikeErg’s build and feel compared to a road bike.
3.1) Setting up the BikeErg
Before your first ride you’ll want to adjust 3 elements:
- The seat height
- The handlebar height
- The handlebar reach
Check out this short video on how to adjust the BikeErg to your size and ride preference in under 60 seconds:
3.2) Damper Setting
Now that the bike is set up, we can talk about the damper setting. The damper works on a scale from 1 to 10. It can be modified using the lever on the side of the flywheel cage.
In short, the damper controls the airflow to the flywheel. The higher the damper setting, the more air will enter the cage and the harder the ride will become.
Changing the damper setting is like switching gears on a regular road bike. The advantage of the damper is that you can quickly and smoothly adjust the resistance depending on your needs.
Here’s a short video showing you how to adjust your damper setting while riding:
3.3) BikeErg Calibration
After a set number of kilometers, the BikeErg will prompt you to recalibrate it. This ensures that the power reading on your PM5 is always accurate.
Here’s how to complete a full calibration of the Concept 2 bike:
3.4) Accessories for the Concept 2 Bike
In this section, I’ll list a few of the accessories that are currently available for the Concept2 Bike Erg. Please note that there are more accessories that you can use as well!
- Concept 2 Toe Clips
- Bike Floor Mat
- BikeErg Device Holder Retrofit (Iphone, Ipad, etc..)
- Smartphone Holder (for PM3,4,5)
- Water Bottle Holder
- Bike Seat Cover (Great for long rides)
- Polar H10 Heart Rate Monitor
At this point, you should be ready to start riding your bike! The next part of this guide will cover Concept 2’s Performance Monitor, which is, in my estimation, the best stationary bike monitor currently available on the market.
4) PM5 (Performance Monitor) on the Concept 2 Bike
In this section I’ll take you through a detailed tour of the BikeErg’s Performance Monitor.
What you’ll learn in this video:
- Settings, Manual Calibration, Battery Levels and Drag Factor
- How to view your sessions and display the validation code
- How to connect your heart rate monitor (Polar or Garmin)
- How to connect your ErgData app to the PM5
- How to plan different sessions using different units
- How to change your display mode once you’re riding
- And more!
4.1) Setup and Connect the ErgData App
If you want to get the most out of your Concept 2 experience, you’ll need to download and setup their free ErgData app (iOS or Android). This mobile app connects your BikeErg to your free logbook account in order to track your workouts, your monthly totals, your best rides, and much more.
Watch this video tour of the Concept 2 Logbook as well as the ErgData app to learn more.
VIDEO APP
Once you have set up your logbook account and logged into your ErgData mobile app, you can pair your PM5 like I demonstrated in the PM5 video.
4.2) Connect your BikeErg to 3rd Party Apps & Tools
The PM5 can communicate with other devices and applications via Bluetooth or ANT+ technology. Note: you’ll need a (free) logbook account et up before you can connect to most 3rd party apps.
Here’s a list of other ways you can connect your PM5 to 3rd party Tools and Applications:
4.3) How to Update the Firmware of the PM5
Before you connect your Concept2 BikeErg to Zwift or any other 3rd party app, it is recommended that you download the most up-to-date firmware. If you’re not sure whether your firmware is up-to-date, complete the steps below.
Check for Updates
To check whether your PM5 firmware needs an update, complete the following steps:
- On your PM5, select the Menu button.
- Select the More Options button.
- Select the Utilities button.
- Select the Product ID button.
- Compare your “PM Firmware Version” to the latest version listed on the Concept2 website.
- If the version numbers match, your PM5 is up-to-date.
Updating your PM5 Firmware
If you need to update your firmware, you can follow the steps outlined on the Concept 2 site.
4.4) Concept 2 Bike Units and Conversions
As you saw in the PM5 video, the monitor allows you to display 3 different units to track your efforts and progress. These units are:
- Calories per hour (cal/h)
- Pace in Splits (0:00/1000m)
- Watts (w)
Concept 2 offers a Pace-to-Watts calculator on their website. You can also look at the charts below to find the matching values between different measurement units.
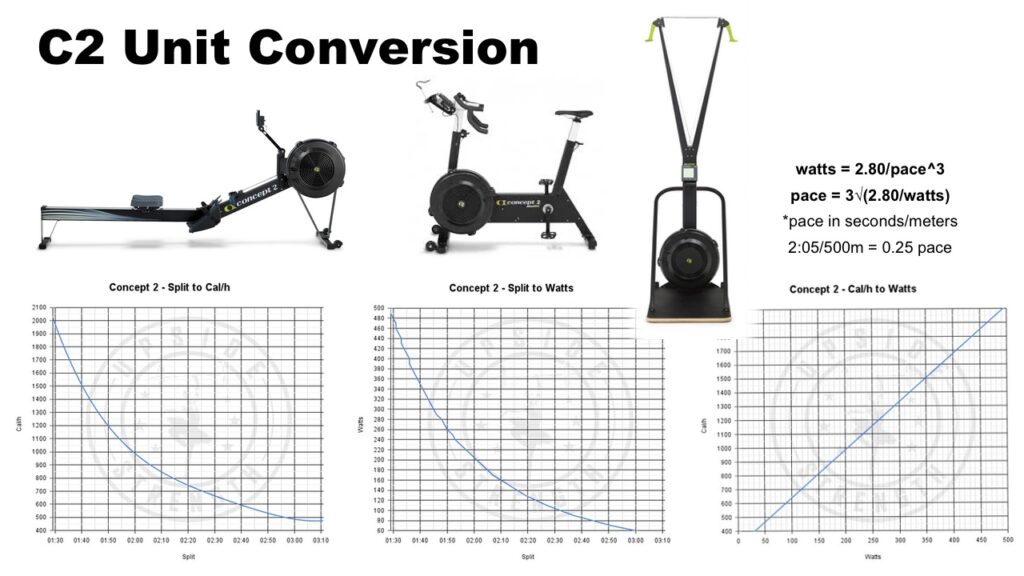
As you can see in the charts above, the split is a non-linear unit (as opposed to watts and calories per hour). This means that the faster you go, the harder it is to take an extra second off your split pace.
Here’s a concrete example: to go from 2:05 to 2:00 (5” improvement in pace), it requires a 23w jump in power. But to go from a 1:45 to a 1:40, it requires a 48w increase in power (x2!!).
If you’re interested in a calorie calculator, Concept 2 provides one here.
5) Sample BikeErg Workouts
You can obviously plan any type of workout with the BikeErg’s PM5 or the ErgData app. You can even plan the more intricate sessions directly on the ErgData app, as we saw before. However, here are my 5 favorite training sessions on the Concept 2 bike.
1) 60 Minutes Steady Ride (Single Time)
This is a great, easy ride that I like to do most days of the week. Stick with a difficulty of 2-3/10, a high cadence (>80rpm) and remember to take long, deep breaths as you go along! These Zone 2 sessions will have a significant impact on your endurance, fitness, and your recovery.
2) Repeat Sprints 5-8x 10”/1:50 (Interval: Time)
After a thorough warm up, setup your PM5 with 2:00 time intervals with 0:00 rest. Sprint as hard as you can for 10 seconds at the start of each 2:00 round”. For each sprint, make sure your damper is properly adjusted. You should reach a peak cadence of 110 to 130 rpm when you’re at top speed. After you’re done sprinting, lower your damper back down and spin at an easy pace for the remainder of the round. Write down the highest watts you see on each rep and track your progress over time.
3) 4000m For Time (Single Distance)
This is the classic distance to test yourself on the BikeErg. Akin to the 2000m tests on the Rower and the SkiErg, it should take you anywhere from 6:00 to 10:00 to complete. To give you an idea of the power you’ll need to hold, here are some landmarks to aim for.(9:00 = 142w / 8:30 = 169w / 8:00 = 203w / 7:30 = 246w / 7:00 = 302w / 6:30 = 378w / 6:00 = 480w)
4) High Intensity Interval Training 8x 1000m/2:00 (Interval: Distance)
This is a classic interval set often used on the Rower and SkiErg alike (8x 500m/2:00 on those machines). Your average pace on a hard session of this format will give you a good idea of what you’re capable of holding the the 4000m time trial above!
5) Tempo Intervals 3x 10:00/3:00 (Interval: Time)
After a good warm up, set out for 3, 10-minute intervals at a 6/10 intensity. Your legs will be screaming at you but your breathing and heart rate should be under control! If not, you’re going too hard. Active recovery (light spinning) between intervals is recommended here.
5.1) BikeErg Training Program
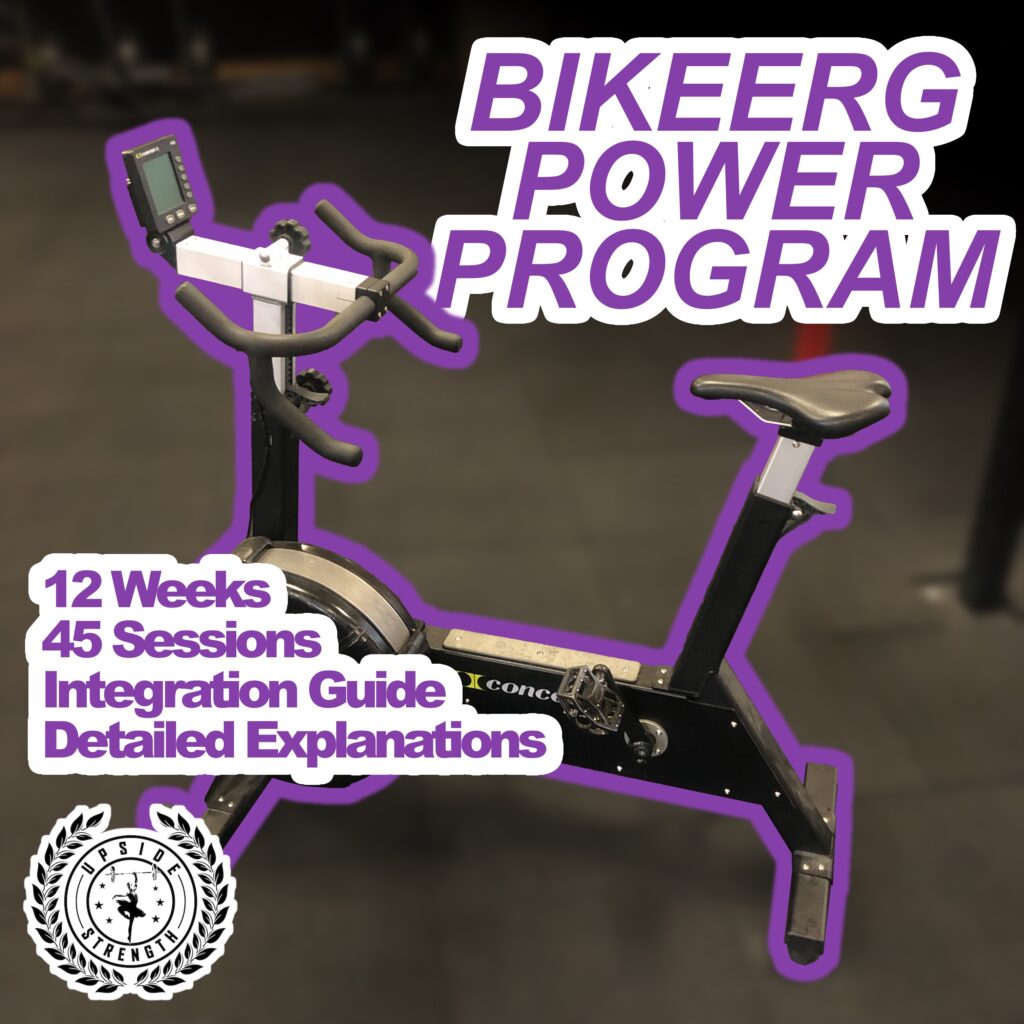
If you’re looking for a more structured BikeErg training plan, take a look at my two 12-week programs, BikeErg ENDURE and BikeErg POWER. Both those programs are compatible with most CrossFit or strength training routines if integrated properly (see the integration guides included).
BikeErg POWER: VO2 Max and Sprinting
This training program will boost your performances at high intensity using the Concept 2 BikeErg.
During this 12-week program, you will explore different types of efforts (Neuromuscular Power, Long Sprints, VO2max Training, Fundamental Endurance) that will allow you to perform better on your short efforts (10 seconds to 15 minutes) in the sport of CrossFit or in other sports.
Learn More about
BikeErg POWER
BikeErg ENDURE: Recovery & Endurance
This training program (Version 2.0) will help you improve your endurance and durability using the Concept 2 BikeErg.
With 4 different training cycles available, you will explore several effort intensities (Zone 2, Tempo, Threshold) that will allow you to recover faster and perform better on your long efforts (over 15 minutes) in CrossFit and in other Sports.
Learn More about
BikeErg ENDURE
6) Comparison to other Exercise Bikes
The BikeErg is a one-of-a-kind machine that belongs firmly in the Concept 2 Erg family. However, there are other options out there. Let’s have a quick look at what the main differences are between this machine and what competitors have to offer in comparison.
BikeErg VS Assault Bike
The main difference between those two is that the BikeErg is a legs-only machine while the Assault Bike is a full body fanbike. More importantly, you cannot change the resistance on the Airbike, so your cadence will always be coupled to your power output. In short, if you’re moving slowly, your cadence will be really low. However, it’s a great tool for all-out sprints. The full body aspect makes it a great bike to train your cardiovascular system!
Concept 2 Bike VS Road Bike
If you’re planning on taking advantage of the open spaces on bright and sunny days, a road bike might be the best option for you. Besides moving your BikeErg around the living room, you won’t be going very far with it!
BikeErg VS Peloton Bike
The big upside of the Peloton bike is that it provides interactive classes and training sessions through the Peloton interface and screen. The Peloton bike is near-silent and adjustable. However, if you like precise numbers and a bit of wind doesn’t bother you, the BikeErg might be the best option for you!
Concept 2 Bike VS Rower
The Rower is Concept 2’s first ergometer and remains its flagship product. Compared to the BikeErg, the Rower offers a full body workout. That being said, here’s an important consideration to have when choosing between the bike and the rower: The rower requires good technique to be used optimally. Good movement on the rower is also important to prevent lower back issues. The bike doesn’t require any specific technique to be used fully.
Concept 2 Bike VS WattBike
The Concept 2 BikeErg and the Wattbike are both indoor cycling bikes designed for home and gym use. Here are a few key differences to consider when comparing the two:
- Resistance type: The BikeErg uses air resistance, while the Wattbike uses a combination of air and magnetic resistance.
- Workout variety: Both bikes offer a range of workouts and programs, but the Wattbike also has the option of using a power meter to track your output in watts.
- Adjustability: Both bikes have adjustable seats and handlebars, but the Wattbike also has the option to adjust the foot pedal distance and the crank length.
- Price: The BikeErg tends to be less expensive than the Wattbike.
Ultimately, the best choice for you will depend on your fitness goals and personal preferences. The BikeErg may be a good option if you’re looking for an affordable indoor cycling bike with a range of workouts and programs, while the Wattbike may be a better choice if you’re interested in tracking your power output with a power meter and have more specific adjustability needs.
6.1) BikeErg Reviews
I’ve compiled for you the top 5 third-party reviews of the Concept 2 BikeErg:
7) Common Questions about the BikeErg (FAQ)
The BikeErg is a stationary exercise bike that allows you to perform indoor cycling workouts. It is similar to traditional stationary bikes, but it has a flywheel and resistance system that more closely resembles an outdoor bike.
The BikeErg has a damper that controls the resistance on the flywheel. The damper can be adjusted to increase or decrease the resistance, which will affect the difficulty of the workout. You can also adjust the resistance manually by turning a resistance knob on the bike.
Yes, the BikeErg is compatible with a variety of virtual training apps, including Zwift and TrainerRoad. You will need to connect the BikeErg to your computer or device using a compatible ANT+ or Bluetooth device.
The BikeErg is suitable for people of all fitness levels. It has a wide range of resistance levels, so you can adjust the intensity of your workout to match your fitness level. It is also adjustable to fit a variety of body sizes, so it can be used comfortably by people of different heights and weights.
The cost of the BikeErg can vary depending on the model and where you purchase it. Prices generally range from around $1,000 to $1,500.
If you regularly ride outdoors with clip pedals, it might be interested for you to mount clip pedals on your BikeErg as well. This way, you will get a similar riding feel and will be able to get a better transfer from your indoor to your outdoor training.
I recommend that you use a low damper setting in order to have a high cadence (>80rpm). The actually power will vary greatly from one person to the next, depending on their respective conditioning level. But it’s usually less that you think! See my complete Zone 2 Training Guide for more details.
Conclusion
In conclusion, the BikeErg is a high-quality stationary exercise bike that provides a realistic and challenging cycling experience. It is suitable for people of all fitness levels and can be used with virtual training apps to enhance your workouts. With its adjustable resistance and fit, the BikeErg is a versatile and effective tool for indoor cycling. Overall, it is a great investment for anyone looking to improve their cycling fitness and performance.
Pingback:BikeErg Guide: How To Get The Most Out Of Your Concept 2 Bike